|
|
Part 4
Amplifier Quality
In the last 10 years the quality of amplifiers has excelled. To
the audience, there’s less and less of an audible difference
between units. You do have to pay attention to the power output
and the impedance however. Some amplifiers are advertised with
a specific power rating that sounds really good, until you see
that it’s into 4? load. For example, if an amplifier is
rated for 800 watts into a 4? load, when you connect it to a typical
8? speaker, you’ll really only have about 400 watts driving
the speaker.
Amplifier Inputs
Another issue with amplifiers is the input stage. Some amplifiers
don’t have a proper differential/balanced input; they only
have a quasi-balanced input. Such inputs can allow noise and ground
problems into the system. This type of input is typically found
on less expensive models–even from the same manufacturer.
Such inputs can’t ignore noise picked up on the audio cable
very well. If the cable run is short and interference isn’t
a problem in your area, you might get away with it. If, however
you have a long cable run, the area is prone to interference,
or if the sending piece of equipment (most likely an equalizer)
also has a quasi-balanced output, you’re going to have problems.
What’s interesting to note is that many people will say
it’s no big deal to have quasi-balanced inputs (or outputs)
and that you can get away with it. To an extent, this is true.
The problem is, when there is a problem, many people don’t
know exactly what’s causing it, and it’s rarely blamed
on the input or output stages of the equipment, wherein the real
problem lies. Thus, some will say they’re never heard of
a problem with using such equipment—simply because the blame
was never put where it should have been.
(here's a nice
article on interconnction issues with balanced and unbalanced
circuits from Sony, and here's a great one from Rane)
It’s NOT a Volume Control!
Keep in mind the control knob found on the amplifier is not a
volume control but an input attenuator. What it does is determine
how high the input signal must be to drive the amplifier to full
output without distortion. Even with the input attenuator set
to a very low level, a signal that’s high enough will drive
the amplifier to full output and often with distortion. The distortion
can come from the input stage of the amplifier being overdriven
(in an attempt to make the output level louder).
What Size?
So how do you know what size amplifier to get to power a specific
speaker? The best option is to use an amplifier that has an output
rating higher than the speakers’ power handling rating.
One of the biggest reasons speakers get blown up is because they’re
underpowered. If you use an amplifier that’s too small,
it can often cause distortion due to lack of control. This distortion
creates heat, and before long the speaker fails. To be safe, the
amplifier should be able to provide twice the power of the maximum
power handling of the speaker. If you can’t get this close,
multiply the maximum power handling level of the speaker by 1.8
and 2.5; look for an amplifier that has an output within this
range.
Output Specifications
Are you familiar with the way output specifications are listed
for power amplifiers? You’ll see that they list the power
output based on the impedance of the speaker connected. Most ratings
are given for loads of 8Ω, 4Ω and 2Ω. Now, ohm’s
law states that if you have a power rating into a specific impedance,
cutting the impedance in half will result in twice the amount
of power flowing. When it comes to power amplifiers, we would
then expect the following to take place, assuming an initial rating
of 100W (100 watts) into an 8Ω load:
8Ω - 100W
4Ω- 200W
2Ω - 400W
Unfortunately, this isn’t the case when it comes down to
real life. The power conversion in an audio power amplifier isn’t
quite so true. Here’s a real life example from a few different
amplifier manufacturers:
Load |
Output
power |
|
Load |
Output
power |
|
Load |
Output
power |
| 8Ω/ch |
300W |
|
8Ω/ch |
400W |
|
8Ω/ch |
1100W |
| 4Ω/ch |
475W |
|
4Ω/ch |
660W |
|
4Ω/ch |
2050W |
| 2Ω/ch |
550W |
|
2Ω/ch |
975W |
|
2Ω/ch |
3000W |
| |
|
|
|
|
|
|
|
| 8Ω/bridge |
950W |
|
8Ω/bridge |
900W |
|
8Ω/bridge |
4100W |
| 4Ω/bridge |
1100W |
|
4Ω/bridge |
1100W |
|
4Ω/bridge |
6000W |
The first three listings for each amp are the specifications
given for each channel when the amp is operated in stereo mode.
The last two listings are the specifications given when the amp
is operated in bridge-mono mode.
This is what happens with EVERY audio power amplifier, regardless
of who designed it, who sells it, or whose name is on it. The
power conversion doesn’t follow ohm’s law.
What this means is that if you have a speaker rated for 500 watts
at 8Ω and you connect it to an amplifier rated for 500 watts
at 8Ω, you’ll be just fine. What many people do, however,
is connect two of those 500 watt speakers to the amplifier channel,
thinking that with twice the impedance (now 4Ω if they’re
in parallel), they will each get 500 watts of power from the amplifier.
In reality, they each only get 325 watts or so—again, due
to the power conversion not following ohm’s law. This is
really cheating yourself when it comes down to it; instead of
trying to find a larger amp that can run two speakers per channel
with the proper output power, you should really just get smaller
amplifiers and connect one speaker to each amplifier channel.
Remember, it takes doubling the power to increase the sound pressure
level by 3dB; you need to increase the power level 3 times (9dB)
to double the (perceived) loudness of sound (though in a closed
room, this rule doesn’t always apply).
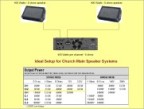
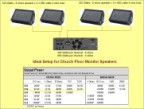
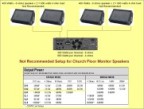
Here's some more examples to look at in regards
to connecting stage monitors. Click any of the images below to
open them in a different window.


Bridge-Mono Mode
What is it? Using a normal two-channel amplifier, bridging is
done by using only one of the input stages to drive both channels
of the amplifier. The two amplifier channels work together, one
side pushing, the other pulling. This creates an output with more
power than the single channels alone could provide. This of course
turns your two-channel amplifier into a one-channel amplifier
(which may or may not be an issue). When using an amp in bridge-mono
mode you also limit the lowest impedance you can connect to the
amplifier. Most quality amplifiers can support a load of only
4Ω, sometimes as low as 2Ω when used as a two-channel
amplifier. When used in bridge-mono mode, these same amplifiers
often suggest no less than an 8Ω load, sometimes as low
as 4Ω. This usually isn’t a problem (since you’re
only connecting one speaker to one amplifier channel), but you
do need to be aware of the issue to ensure you don’t create
a problem.
The lower the impedance an amplifier has to drive, the harder
it has to work, the more heat it generates, and the short its
life span is.
Amp Mounting Locations
If the amplifiers will be located in an equipment room, a typical
fan-cooled amplifier is a fine choice. However, if the amplifiers
are located within the sanctuary or in a noise sensitive area,
you must use convection cooled units. These of course, cost more
than the more common fan-cooled units.
How close should the amplifiers be to the speakers they’re
driving? The closer, the better, but you don’t need to go
overboard by mounting them up in the attic! Most churches have
no trouble keeping the speaker cable run less than 100 feet, this
is just fine. Remember, the longer the cable, the more signal
loss will occur. This means you need to use heavier cables which
cost more. More often than not, amplifiers are located in an equipment
closet in a balcony or behind the platform. Just ensure this room
doesn’t experience high temperatures, especially in summer.
Many such equipment closets never get HVAC vents put in them (why
bother?) and thus the rooms are very cold in winter (fine for
the amplifiers) and very hot in the summer (not good for the amplifiers).
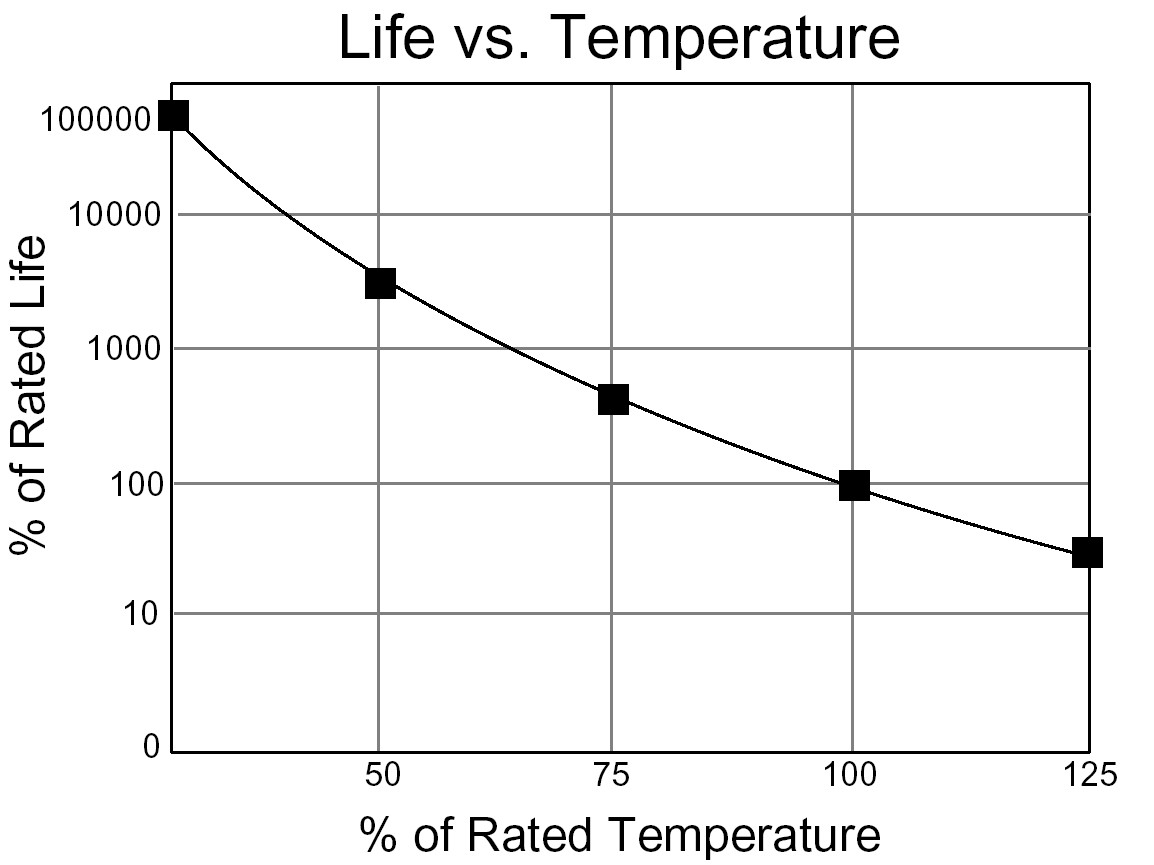
The life expectancy of electrical components is directly related
to the temperatures they’re exposed to both long and short
term. The warmer it is, the shorter life they have. For some components,
this means that for each increase in temperature by 10-degrees
Fahrenheit, their lifespan can be cut in half. Thus, if a component
is rated to operate 10 years at 90ºF, it may only last 5
years at 100ºF or 2.5 years at 110ºF. If a piece of
equipment such as an amplifier is in a high-temperature environment,
it can’t be cooled properly and thus wears out much sooner
than it should.

chart showing capacitor life vs. Temperature
Cables & Speaker-to-Amp Ratio
Finally, when it comes hooking it all up, for the best performance,
each main speaker in the system should have its own amplifier
channel. No amplifier channel should drive more than one speaker.
By default, each speaker should have its own dedicated speaker
cable run from it to the amplifier. Don’t share speaker
cables or amplifier channels. This ensures the system can be set
up and adjusted properly. It also aids in troubleshooting if there’s
ever a problem.
Floor monitor speakers can afford to share amplifier channels
if needed, but you need to ensure you don’t overload the
amplifier. Such connections are set up so the speakers are wired
in parallel with each other. Never wire speakers in series, this
results in poor audio quality and can lead to overheating and
damaging your amplifier.
Don’t skimp on the size of cable you use. One of my associates
reminds people to “buy the largest piece of copper you can
afford”. This is good to a point, of course, but you don’t
need to go to extremes either. 12-guage speaker cable is easily
found at a low price. Unless your speaker is rated less than 100
watts or is closer than 50 feet, use it. Otherwise, 14-guage is
a good choice for those smaller speakers or short runs. Be sure
to use twisted cable. This is cable where the two conductors are
twisted around each other. Using flat zip-cord style cable can
mean problems with noise in the audio system. Every amplifier
has what’s called a feedback loop which sends a portion
of the output back into the amplifier. If you use flat non-twisted
conductor cable, it acts just like an antenna and can feed noise
and or RF right into the feedback loop. This results in hearing
all sorts of noises – or not hearing anything, but wondering
why your high frequency drivers are being blown out all of the
time (if the frequency of noise is very high, the amplifier will
amplify it and the speaker will TRY to reproduce it). Some will
suggest using normal THHN wire as used by electricians for wiring
electrical circuits. This wire is fine to use, however you need
to twist it and then ensure it’s well labeled as being the
audio system and that future electricians shouldn’t tap
into it. The extra efforts required to do these simple things
ends up taking too much time and energy and makes standard off-the-shelf
speaker cable a much better choice. (If you’re wondering,
yes, there have been cases of electricians tapping into the cables
used for amp to speaker wiring when THHN is used in conduit.)
Powered Speakers
What about powered speakers? If you’re doing a self installation,
you need an electrician to install the AC and then run another
set of cables for the signal lines. Before installing it, fire
up the whole speaker system while it’s still on the ground.
Make sure you don’t have a Pin-1 problem or other AC problems.
(Powered speakers are well known to have Pin-1 problems.) If there
are problems once it is installed, there’s not much you
can do besides take it down and send it in for repair. If you
use a separate speaker and amplifier, you can still swap amplifiers
to determine if it’s a faulty amplifier or speaker. I feel
powered speakers are fine for touring groups who set up and tear
down every few nights, but for now, I don’t feel comfortable
suggesting their use for permanent systems in churches. If inspected
on a regular basis and easily swapped out for repair, (as in a
temporary portable system) they can be a good option. But for
a church who wants to install it and forget about it, it’s
not worth the convenience.
Conclusion
The selection of an amplifier is based on the power handling of
the speaker it will be used with and the requirements of the system
as a whole. For the most part, you’ll do well with any of
the higher-quality amplifiers available on the market. This doesn’t
mean they need to cost a lot. Expect to spend $500 to $800 for
an average amplifier capable of 400 watts into each channel at
8?. Speaker selection depends on the acoustics of the room, the
size and shape of the room, the coverage required, the sound pressure
level required, and the fidelity desired. There are just too many
variables to consider and too many speaker manufacturers and products
on the market for the average person to determine what’s
best for their sanctuary. If you find this too daunting, get professional
help or an independent consultant. Speaker prices range from $500
to $1,500 for an average “main system” speaker. Larger,
more powerful speakers or those suited better for rooms with poor
acoustics can cost $1,800 to $4,000 and more. Smaller speakers
used for filling in or a delayed system can cost $100 and up.
If you have acoustical problems, a low ceiling, or need a great
deal of pattern control or sound pressure level, you will need
to make a bigger investment if you want to do it right.
Don’t use what another local church used or what other
churches in your denomination have used just because it worked
well for them and you like the sound. Ten churches can look the
same, be of the same size and use the exact same sound system
design, yet each church may need different models of the same
speaker line, different amplifiers and be installed differently
even by a few feet for all of them to sound good. You need to
choose the product that fits the situation, not the hype. Speaker
types and locations are the most important parts of a good audio
reinforcement system. The amplifiers that drive them are nearly
as important; you need to ensure you’ve made a good match.
The design of your system is forever and the equipment will need
to be upgraded as it ages. Designing your system right is the
single most important step to good sound after acoustics. The
less you compromise here, the healthier your church will be.
© 2003 Blake A. Engel, All Church Sound |